the most wonderful time of the year.

I’m not kidding.  This is the most wonderful time of the year. I’m extra happy about the holiday season this year because it’s extra long.

We hosted our first holiday open house this past weekend and it was so fun. I enjoy a late night and a dance floor as much as the next lady, but sometimes it’s nice to have a deviled egg and some sparkling wine at 5pm with all of your best friends, know what I’m saying?

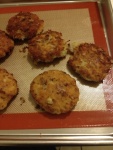
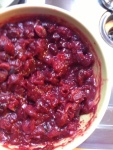
Some highlights from the past few weeks include homemade fudge, Henriot Brut Rosé, cute Christmas ornaments, wreath sightings around Chicagoland, latkes made from leftover potatoes,a beautiful holiday floral arrangement from Larkspur (who just happend to celebrate its 8th anniversary in Bucktown) & homemade cranberry relish.

Homemade Cranberry Relish (for when you realize you don’t have any applesauce for your latkes, but have a package of cranberries)

Ingredients:

1 120z package cranberries

1 shallot, minced

1 clover garlic, minced

1 cup apple cider vinegar

1/4 cup butter

1/2 cup brown sugar

Salt to taste

Pepper to taste

1/2 tsp ground ginger

Method:

1. Melt butter and saute shallot and garlic until fragrant

2. Add vinegar & cranberries, simmer

3. Add sugar, salt, pepper, and ginger. Simmer until thickened.   Remove from heat and serve with whatever you like.

summertime…

Well, it’s finally hot in Chicago. We’re settling into the new place and enjoying seeing friends.

Sometimes Thomas and I like to drink out of fruit.
Photobucket
(whitney took the picture)

Sometimes we celebrate birthdays, this week Tselanie’s.
Photobucket

To do that, we’ll light candles.
Photobucket

And eat Niçoise salad.
Photobucket

And escargot.
Photobucket

YUM!

Cold Roasted Salad

The hot days of summer demand a few things: low effort tasty foods that leave leftovers so I can go to pool more and not worry about what to eat. It’s a tall bill to fill, but this salad manages just fine. I only wish there were more of it!

Photobucket

Ingredients:

1.5 lb tiny/fingerling potatoes, all potatoes cut in half (if you use regular big potatoes, just cube the potatoes into 1″ dice)
1 lb itty bitty tomatoes (no subs, they are too cute) pricked so they don’t burst in the oven
2 ears corn
1 can cannellini/ garbanzo beans, drained and rinsed (I didn’t have these for some reason but they will taste good)
2 slices bacon (you can definitely omit this, I just included it because I’m a Midwestern fatty who grew up eating potato salad with bacon in it)
Olive Oil TT for roasting veggies
TT Salt
TT Pepper
TT Crushed Red Pepper

*Foil and parchment paper make this a lot easier with the corn and tomatoes.

(For the dressing)
1/2 cup goat cheese
1 cloves garlic, finely minced
2 TBS olive oil (or rendered bacon fat from when you cooked your bacon)
1 TBS balsamic (or whatever vinegar you like, I used a little apple cider vinegar too)
1TBS honey
Fresh basil chiffonade (however much you like)
TT Salt
TT Pepper

Instructions:

1. Set your oven to 400 and roast your potatoes with some olive oil and salt/pepper until they are soft in the middle and golden brown on the outside (about 45 minutes), set aside. While you are doing this, you can also cook your bacon, let it cool, then finely chop it up, so it’s almost like bacon dust. Save your bacon fat.

2. Roast your tomatoes with some olive oil and salt/pepper until they begin to caramelize (about a half hour), set aside.

3. Roast your unshucked corn in foil until its cooked, set aside (if you want the kernels to get a little brown, just turn on your burner and let it roast a little on the flame— just don’t tell your landlord and please remember to remove the leaves and corn hair first)

4. When everything is roasting, you can make your salad dressing. Take your vinegars in a bowl and slowly whisk in the olive oil or rendered bacon fat. Add the goat cheese. If your using your freshly rendered bacon fat, the goat cheese will melt right away. If you are using olive oil, it helps to use goat cheese that has come down close to room temperature. With enough mixing, you’ll get a creamy looking dressing. Add the garlic and honey, whisk until combined. Then, add the bacon dust if you’ve decided to go with bacon. Taste your dressing- if it’s too acidic, add more honey! Now is a good time to add salt and pepper. Tweak it however you like!

5. When all of your veggies are roasted, shuck the corn, and cut the kernels off the cob into a bowl. Add the potatoes and tomatoes. If I had beans, this is where I would put them- cannellini beans would play especially nicely with the vegetables. Next, add the dressing. Toss the dressing in the salad so that everything is evenly coated. Now add the basil and crushed red pepper. Here you go! Easy roasted summer salad. Chill it in the fridge and take it to a bbq or just eat it all yourself.

**You might wonder why I’d recommend roasting veggies when it’s so hot outside. Well, I like how cold roasted vegetables taste and besides the time commitment, the recipe is pretty easy. Watch a show or read a book while the veggies roast!

**This recipe could be vegan if you omit the cheese, honey, and bacon, just saying. It would also do fine without the garlic!

california

Last week, GB and I had the chance to go on a vacation in California. We flew into San Francisco, spent a few days in Big Sur, and capped our trip off with 3 days in Los Angeles. We drove down Highway 1, which is the most beautiful road I have ever seen. Our trip was really relaxing.

San Francisco
Photobucket
We arrived in SF in the middle of the Pride Parade, which was an inspiring introduction to such an energetic city.

Highlights include:

The Ferry Building
Freshest oysters ever at Hog Island Oysters
Tiny shampoo bottles at Hotel Serrano
Breakfast at Sears
Contemporary art and more at SF MOMA
Afternoon tacos at Taqueria Cancun
Best icecream in a life time at Bi-Rite Creamery
Outstanding Italian at Delfina
Mixology taste testing at Alembic
Real cd purchasing at Amoeba Music
Cheese from Cowgirl Creamery
New Orleans style iced coffee and Chiapas for home from Blue Bottle Coffee
Salted pig parts from Boccalone

Big Sur
Photobucket
Big Sur sure lives up to its reputation as a beautiful and rustic paradise.

Highlights include:

Rustic evening complete with a campfire and s’mores at Big Sur Cabin and Campgrounds
Hiking in Pfeiffer State Park
Lunch at Nepenthe Restaurant
Quaintness and comfortable beds at Deetjens Inn
American splendor on Highway 1

Los Angeles
Photobucket
GB and I were both surprised by how much we liked LA. As far as I’m concerned, LA is where the eats were tops.

Highlights include:

Margaritas at Malo Tacos
Sleeping/ people watching at The Standard Downtown (especially the rooftop pool!)
Drinks at Tiki-Ti
Snacks at Ciudad
Dinner at Mo-Chicha
Art at The Getty
Planets at The Griffith Observatory
Sushi at Katsu-Ya Sushi
Fro-Yo at Pinkberry
Breakfast Pupuserias at Sarita’s Pupuseria
California cuisine at In-N-Out Burger
Korean Fried Chicken at Kyo-Chon Korean Fried Chicken

It was great to see our friends Sarah, Dave, and Lara. Thanks for hanging out and for all the good recommendations!

We arrived back in Chicago on the 4th of July just in time for bikerides, bbqs, and fireworks. I love California, but I am a Midwesterner at heart, so I’m happy to be back in my humid home.

drinks at Alembic in SF.
Photobucket

city apricot jam

I am getting my camera back this weekend from Indianapolis, but I’m so excited, I’m going to post without pictures.

My friend Annie lives in Pilsen in Chicago. She has a fantastic backyard, which happens to include a real, live, fruiting APRICOT tree!

So, on Tuesday Gerard and I went to go pick about 10lbs of apricots. I’ve made apricot cobbler, 12 jars of apricot jam, and am using the rest to infuse some tequila…. and there’s still a ton of fruit on the tree! It’s so exciting to pick fruit from a tree in the middle of a huge city like Chicago. I know a lot of people in warmer areas often have this experience, but as a stalwart Midwesterner, it’s one I’ve never had. I’d suggest making friends with people who have fruit trees.

Making the jam has been an easier process than I originally thought it would be and I can’t wait to have it with crackers and goat cheese.

I found this recipe to be the simplest, and from what I’ve tasted, also the best apricot jam I’ve ever tasted!!!

I’ll post pictures of my babies when I get my camera back.

Also, when you’re canning, the jars make a really funny “ping” sound. Gotta get your kicks somehow.

Greek Veggie Burgers

Hi Friends. Sorry I’ve been MIA. As previously mentioned, I’m starting to post again. So, drumroll… Here we go.

This morning, my friend Jodie gave me part of her bumper crop of tarragon (along with rosemary and some chives)… Thanks Jodie, Have fun in CA!

Photobucket

I was particularly excited to receive such a wonderful surprise, since I had already decided to make veggie burgers for lunch, and needed some fresh herbs. The restaurant where I am a server has a fantastic house-made veggie burger. I’m a dedicated carnivore, and sometimes I still crave it. The basis of the burger is quinoa, which I’ve talked about on this blog before. I’m always looking for new ways to do old things, so when I had some left over quinoa yesterday, I knew what I’d be making today. Also, I’ve recently become obsessed with all things that fall into the category of Greek/Middle Eastern Food. Now, I know that’s a HUGE category, and I’m not strictly following recipes, but the things I’ve been making lately are definitely influenced by a Grecian sensibility- olive oil, feta, red onions, tomatoes, cucumbers; what’s not to like? As the weather gets warmer, refreshing food becomes a top priority and the Greeks seem to have figured it out pretty well.

Ingredients
1 & 1/2 cups cooked quinoa (I used red, but brown will work too)
1 can garbanzo beans
3/4 cup cracked buckwheat (you can use Bulgar wheat too, I’m just trying to stay gluten free)
1 small red onion, chopped
1/2 cup crumbled feta
1 egg
1 teaspoon salt
Fresh oregano to taste ( I used 1/4 cup)
Fresh tarragon to taste ( I used 1/4 cup)

Supplies
Food processor (an immersion or regular blender would work too)
Sheet tray
Parchment Paper (BEST STUFF EVER!!!)

Directions
1. Preheat oven to 350 degrees Fahrenheit. Cut parchment paper to size and place on top of sheet tray.
2. Combine all ingredients in a food processor. Pulse until mixture is combined. It should be thick but pliable and definitely not dripping wet.
Photobucket
3. Once the mixture is to your desired texture, stop pulsing it and remove it from the bowl.
4. Form into patties place on parchmented (? is that a word) sheet tray and cook for 25 minutes, opening oven to flip the burgers half-way through the cooking time.
Photobucket
5. Remove patties from the oven and serve on a bun if you like. I served mine on a bed of spinach with chopped cherry tomatoes, cucumbers, and a lemon-olive oil vinaigrette. Iced green tea with lemon and ginger as well as Greek yogurt w/ honey helped to round out the meal.
Photobucket

*This will make much more than one serving. It freezes very well, just make sure you form it into individual patties before you freeze it.

**Also, it’s good to be back.

***Also, ginger, lemon, green tea is good.
Photobucket

back

The good news is, I received a new camera for Christmas. The bad news is, I haven’t posted in almost 2 months! I’m back, with a camera, so prepare to eat. So far, the winter has proven to be extra chilly and pretty productive. I’ve been working a lot, the end goal being a trip to visit my brother in Mérida, Mexico, playing a lot of board games, getting financial stuff worked out for culinary school in the fall (it’s really happening!), and the thrill of thrills- growing out my hair.

Thus far, the best recipes of this winter have been tomato jam and various soups. After a scary encounter with a scale at a Superbowl Party (uh, probably not the best time to step on a scale), I’ve decided that I need to eat more vegetables and less bacon. I won’t call it a “diet”, but I also won’t call it “eating whatever I want to eat.” Working at a restaurant with one of the best burgers in the city hasn’t helped with the bacon intake, and the kitchen has put me on a bacon embargo… We’ll see how that works out when I work a double next Saturday.

Eating more healthfully, but not less deliciously, involves a little more thought than sticking butter and starch in the oven. Today I’ve made Quinoa and Roasted Cauliflower Salad (I didn’t turn into a hippie, I promise). Quinoa is quite the superfood, according to my extensive Wikipedia research. Regardless of its nutritional properties and rich history, quinoa is pretty damn tasty. It has a nutty taste, kind of like brown rice, but better, and less chewy. At said Superbowl Crisis Party my friend was talking about how you shouldn’t cook with garlic and onions at the same time. I don’t know if I agree 100%, but today I tried just using garlic, and I was pleased with the results. The garlic paired especially well with the nuttiness of the quinoa and the sweetness of the roasted cauliflower.

Also, a slice or 4 of crispy fried proscuitto on the top would take this recipe to the next level on my tongue and hips, but you know, the bacon embargo makes that kind of impossible.

Ingredients
1 cup dried quinoa, prepared as directed (it’s nice in the salad warm; this will also leave you with three cooked cups)
1 head cauliflower
2 handfuls fresh baby spinach
1 cup grated carrot
1/2 cup small tomatoes, chopped in half
1 cup mushrooms, chopped
1 clove garlic, minced
2 tablespoons olive oil, divided
1 tablespoon good balsamic vinegar
1 tsp salt, divided into two 1/2 teaspoons (I use Kosher)
As much freshly ground black pepper as you like
1 tablespoon freshly grated Parmesan Cheese.

Recipe
1. Preheat your oven to 350. Clean and chop your cauliflower so there are no greens. Place in roasting pan. Drizzle one tablespoon of olive oiland one 1/2 teaspoon salt on the cauliflower and mix up with your hands. Cover in pepper. Roast at 350 for abut 45 minutes.
Photobucket

2. Wait a few minutes, check your email or twitter or facebook or read a book. Relax! Now, stop relaxing and start your quinoa. Using a 1/2 quart sized saucepan, put one cup of dried quinoa in the saucepan with two cups of water. **You should rinse the quinoa before you cook it. Bring the water to a boil. Once the water is at a boil, reduce the heat and let simmer until all the water is absorbed.
Photobucket

3. While all this is happening, you should saute the remaining veggies in the olive oil. Add the garlic after a few minutes; when it is aromatic, add the balsamic vinegar. It should be sizzling. Reduce the heat so that nothing gets burnt.
Photobucket

4. Remove your cauliflower from the oven. You’ll only need half of it for a LARGE single serving. Put the cauliflower in the bowl you feel like eating out of. Remove your veggies from the heat and add them to the bowl too. Put your spinach on top of that, and then top it off with a healthy serving of cooked quinoa and not as much Parmesan as you would like.
Photobucket

5. Add salt and pepper,stir up, and eat! The heat from the roasted cauliflower and the cooked vegetables will wilt the spinach and melt the cheese. You do not need any extra dressing for this recipe because the vegetables are cooked in what is essentially a dressing. It’s a pretty healthy lunch and if you follow these directions you’ll have enough for a cold salad tomorrow!
Photobucket

curry enchiladas and mashed cauliflower

Indian and Mexican cuisine are a great example of (nearly) opposites attracting. I apoligize, I am still camera-less, but still excited about Mr. Obama being my (nearly) president, so I’ll forgive my camera being dead. Earlier in the week, I had my friend Lisa over for dinner and Gossip Girl (a must watch for Monday nights). Lisa is a vegetarian and I am not. Most people in my life try to be vegetarians most of the time (see my roommate) so, it is not hard for me to cook vegetarian food. It’s an enjoyable challenge, met with vigor and enthusiasm on my part.

I served some vegetable soup (a variation on a previously posted recipe, unfrozen), mashed cauliflower, and curry enchiladas. I’ll detail the recipes below.

Since I am trying extra hard not to eat wheat these days, sometimes things feel pretty grim. I wanted Indian food. My friend is in India right now, and it’s been on my mind as well as in the news. Is it tacky that a crisis gives me a craving? Probably, but what’s a better way to express concern than through sharing a meal with someone you love? All the good energy we shared during our meal was directed towards India, so I’ll try not to feel too guilty about it.

Mashed Cauliflower
Ingredients:
1 large head of cauliflower
1 tablespoon butter
1 tablespoon olive oil
1/4 cup half and half
2 different teaspoons of salt
As much pepper as you like
1 8×8 pan
An oven preheated to 350 degrees
Hand blender (makes it easier, a regular blender or potato masher will do well if you don’t have this amazing appliance)
1 large/medium sized bowl

Recipe
1. Clean your cauliflower.
2. Chop off the green parts
3. Dice the remaining parts of cauliflower into smaller pieces (all this should fit in the previously mentioned 8×8 pan)
4. Place the chopped cauliflower in the pan, drizzle with olive oil
5. Sprinkle with 1 teaspoon of salt
6. Place in oven
7. Roast for 30-45 minutes (everybody’s oven is different)
8. After it’s roasted, the cauliflower should be soft. Move the roasted cauliflower into the bowl (if you’re using a blender, place it in the blender… if you’re using a masher, place it in the bowl)
9. To the bowl (or blender) add the half and half and butter. The cauliflower should still be quite warm, so the butter will melt without a problem.
10. With your hand blender, (or masher, or regular blender) mix up all the ingredients until they are blended and smooth. Add the remaining salt and pepper when you feel like it.

This dish is great. Cauliflower is very nutritious and this is a fantastic way to incorporate it into you diet along with butter and half and half. Just kidding. It’s better than mashed potatoes, but still not super healthy. I must note, this dish is not for people who do not like cauliflower. I happen to love it, so it worked out well, but not so much for Lisa.

And now to the big shebang: Curry Enchiladas
As I mentioned before, not eating wheat totally blows. There’s no other way to get around it. So, instead of mourning the loss of naan with my Indian food, I decided to just let it be and make Indian style enchiladas. This recipe has a few parts: Filling, Sauce, and Corn Tortillas. Read the whole recipe before you begin because it has several parts that need to be happening at the same time.

Filling for Indian Enchiladas:
Ingredients
1 large potato
2 tablespoons Tandoori Masala Spice
1 tablespoon Curry Spice
1 teaspoon crushed Coriander
1 small onion
1 clover garlic
1/2 cup olive oil (separated into 4 1/8 cups)
As much salt as you like- I used Kosher Salt
1 large pot
1 large pan
1 small pan

1. In the large pot, boil your peeled potato until it is tender.
2. While the potato is boiling, saute the onions in 1/8 cup olive.
3. Combine the curry, tandoori, and coriander with the remaining olive oil into a paste. Once the onions are sizzling and fragrant, add this paste into the onion and olive oil already on the pan. Let that marinate for a minute or ten.
4. By this time (about a half hour) the potato should be soft. Strain the potato and chop it into small square pieces. After that, combine it with the curried onions.
5. Cook the potatoes in the pan with the onions until they get caramelized on the edges. Since you’ll be cooking the sauce at the same time, you can let the potatoes brown. I let the brown for about 45 minutes.

CONCURRENTLY: Curry Sauce
Ingredients
1 15oz can Coconut Milk
1/4 cup curry powder
1 tablespoon tandoori spice
1 teaspoon garam masala
1 tablespoon crystallized ginger, chopped
1/4 cup water
Salt to taste
1 medium sized sauce pan

Recipe
1. Open the coconut milk and pour it into the sauce pan. Make sure you get all the solids from the can into the saucepan. I put the water needed for the recipe in the can, caught all the remnants and then poured that into the sauce pan.
2. Add all the spices and ginger.
3. Bring mixture to a boil, turn down and let reduce. You can taste test it now and decide how much salt you want.
4. When it is reduced to a thickness similar to mole, you are finished!

Once your filling and sauce is done, you are ready to roll the mix into tortillas.

Curry Enchiladas:
Ingredients
Potato/ Onion Filling
8 Corn Tortillas
8 slices Chihuahua Cheese
Curry Sauce
4 x 9 Pan
Oven preheated to 350 (f)

Recipe
1. Prepare your tortillas by laying them flat and placing half a slice of cheese in the middle of each.
2. On top of the cheese, place the potato/onion filling.
3. Roll the tortillas so that the filling will not come out.
4. Place the stuffed tortillas in the pan, again so the filling is not coming out (I did this one at a time and had some help from toothpicks to keep things closed)
5. Once your pan is filled, cover the stuffed tortillas with the remaining slices of cheese, halved so that everything is symmetrical.
6. Once the cheese is in place, pour all of the curry sauce on the stuffed tortillas
7. Place in the oven and let cook for 30-45 minutes (everybody’s oven is different)

These are really tasty. Too bad I don’t have a camera at the moment. bah humbug.
It’s worth noting that without the cheese, this recipe is vegan, so that’s a plus if you are one or know some.
Also, these keep really well in the fridge and are easily reheated in your oven.

PS: Not everybody has such immense access to cheap specialty ingredients in the town where one resides. A quick Google search informed me that there is an immense variety of authentic Indian food available on the internet for much less than typical grocery store prices. I’m sure that shipping makes it more expensive, but Garam Masala from McCormick’s isn’t nearly as tasty (and is 5x more expensive) as the real deal.

PPS: We paired this with a variation on a gin gimlet.
St. Germain Gimlet

Ingredients
1.5 oz Hendricks Gin (Plymouth would probably be better)
.75 oz St. Germain
1 oz fresh Lime Juice
.25 oz simple syrup
Ice
Shaker

Recipe
1. Place Gin, Germaine, lime juice, and simple syrup in shaker over ice.
2. Shake.
3. Serve in a martini glass.

clear broth soup

I know it’s a weird title. Most soup seems to be broth based, and I believe you’re correct in thinking so. However, I take a less scientific approach. Cream based soups don’t seem very broth-y. I feel, a broth is a clear substance. Once you add cream or a starch, it becomes something different- a chowder or a bisque. Tonight, I had a successful experiment. It’s too bad my camera is broken, or I would be posting some lovely pictures of an easy weeknight soup. (FYI, you can make it on the weekend… the weeknight description implies its low levels of effort)

Ingredients:
2 cups Mushroom stock (you can find this at Trader Joes or Whole foods, I’m sure you can also make your own, but I was feeling lazy, so I used Better than Bullion)
1 cup tomato juice
1 large carrot, grated
1 12 oz. package of chopped baby portabello mushrooms
1 cup chopped cherry tomatoes
1 chopped shallot
2 tbs. unsalted butter (I am totally loving Plugra right now)
1 package of frozen sweet corn
1 tbs poultry mix spices (I live in an Ukrainian neighborhood, and have been enjoying the spice mixes that the local stores carry. If you don’t happen to live in a neighborhood of people still bitter about the USSR, I believe a mix of rosemary, thyme, tarragon, dill, and a pinch of mint will work well)
Juice of 1 lemon
1 half teaspoon salt
1 teaspoon fresh ground pepper
1 large pot
1 small pot
1 small pan

RECIPE
1. Boil your mushroom stock however you need to.
2. In a separate, (larger) pot, melt 1 tbs. of butter. Add the shallots and garlic.
3. In a different pan, on lower heat, melt the left over butter. When it is melted, add your herb blend. Turn it to a very low heat. You don’t want to burn the herbs.
5. Once the shallots and garlic release their glorious perfumes, add the grated carrot to the very large pot.
6. When the carrot starts to steam, add the cup of tomato juice to the large pot.
7. After your mushroom stock is ready, pour it into the larger pot.
8. Let it blend for a few moments, until it boils
9. Add the buttered herbs, from the pan into the larger pot.
10. Add the corn, tomatoes, and mushrooms to the larger pot.
11. Turn the heat on the large pot onto low, and let it simmer for about an hour. Take a shower, do your taxes, surf the net. Write another draft of that email to your friend who you miss but don’t know how to talk to. Whatever, I’m sure you’ll find a way to occupy your time.
12. Serve your soup! (I found it worked well with a grated apple, Mahon cheese, arugula, and raspberry salad) Also, try this ginger liquor as a pre-dinner treat!!!

It was good and pretty. I wish my camera wasn’t dead.