the most wonderful time of the year.

I’m not kidding.  This is the most wonderful time of the year. I’m extra happy about the holiday season this year because it’s extra long.

We hosted our first holiday open house this past weekend and it was so fun. I enjoy a late night and a dance floor as much as the next lady, but sometimes it’s nice to have a deviled egg and some sparkling wine at 5pm with all of your best friends, know what I’m saying?

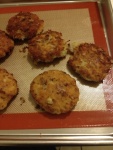
Some highlights from the past few weeks include homemade fudge, Henriot Brut Rosé, cute Christmas ornaments, wreath sightings around Chicagoland, latkes made from leftover potatoes,a beautiful holiday floral arrangement from Larkspur (who just happend to celebrate its 8th anniversary in Bucktown) & homemade cranberry relish.

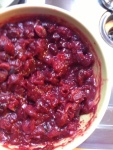
Homemade Cranberry Relish (for when you realize you don’t have any applesauce for your latkes, but have a package of cranberries)

Ingredients:

1 120z package cranberries

1 shallot, minced

1 clover garlic, minced

1 cup apple cider vinegar

1/4 cup butter

1/2 cup brown sugar

Salt to taste

Pepper to taste

1/2 tsp ground ginger

Method:

1. Melt butter and saute shallot and garlic until fragrant

2. Add vinegar & cranberries, simmer

3. Add sugar, salt, pepper, and ginger. Simmer until thickened.   Remove from heat and serve with whatever you like.

summertime…

Well, it’s finally hot in Chicago. We’re settling into the new place and enjoying seeing friends.

Sometimes Thomas and I like to drink out of fruit.
Photobucket
(whitney took the picture)

Sometimes we celebrate birthdays, this week Tselanie’s.
Photobucket

To do that, we’ll light candles.
Photobucket

And eat Niçoise salad.
Photobucket

And escargot.
Photobucket

YUM!

gluten free clafoutis

I’ve made claufoutis(es?) many times before, but this time I took a different approach. Mostly because, cough, I have an awesome mixer that I got for Christmas. Having a standing mixer has really changed my life. It seriously reduces the time of making most anything. It might seem stupid and like I am exaggerating, but if you spend a lot of time cooking, it is an investment worth looking into. Plus, with my NEW (double lot) BACK (no garage) YARD, I am going to use it to make SAUSAGES. I am a nut. I realize that making sausages sounds unappealing to most people. However, if you are reading this, you are probably my friend or Mom/Aunt and either agree with me or find my stance amusing.

Photobucket (Image courtesy of the Spice House website)
I’d also like to give a shout out to Nielsen-Massey Vanilla Bean paste. This product is amazing and convenient. As I re-stretch my muscles in my home kitchen and remember how to enjoy making food for pleasure’s sake & sustenance, I’m remembering that the simplest way is often the best. I also don’t have to hand whip my eggwhites to stiff peaks or get all esoteric and weird about taking logical and tasty shortcuts.

Strawberry Claufoutis
Photobucket

Ingredients:
2 eggs, whites and yolks separated
1 cup sugar
2 cups almond flour (gluten-free, I use Bob’s Red Mill)
3/4 cup browned butter
1 T vanilla bean paste
1/4 t ground cinnamon
Pinch salt
1/2 cup strawberries, sliced
Oven preheated to 350
1 pie pan, greased, lined with greased parchment, & dusted with almond flour.

Method:
1. Beat egg whites until stiff peaks are formed, using a whisk.
2. Add egg yolks, mix until combined.
3. Add sugar & vanilla bean paste.
4. Add browned butter. It should be cool, not hot, so it doesn’t make the eggs curdle. If it’s still warm, temper the mix, just add a bit at a time. When it is done, it will kind of look (and taste) like the most delicious marshmallow fluff. Hey, you know what, you just made a “kind of” Italian meringue! Congrats!
5. Switch to a paddle if you have a mixer, switch to a wooden spoon or spatula if you don’t.
6. Add almond flour, mix batter until well combined (but some lumps are ok)
7. Line your greased/parchmented/floured pie pan with sliced strawberries. If you are using cherries/blueberries/raspberries, you don’t need to chop them up. You don’t have to cut up your strawberries either, I was just trying to make my product stretch. If you decide to not chop them, you will need more than 1/4 cup.
8. Gently pour the almond batter over the tiled strawberries. Be careful not to move the berries around.
9. Tap the pie pan on a hard surface to remove any significant air bubbles.
10. Bake at 350 for about a half hour, until the top is golden brown.
11. Let cool. This is important folks. If you don’t let it cool completely, it will not hold its shape and it will be a tasty disaster.
12. Once it is cooled, you get a plate and gently flip the pie pan onto it. If you’ve greased it properly, it will come right out. Remove the parchment paper, slice up and eat.
13. Try not to eat the whole thing in one sitting, maybe save some for your boyfriend.
14. This is really really good with coffee, a perfect gluten-free breakfast pastry.

pears and plums

Photobucket
I’ve always though of pears and plums as the sweetest but saddest fruits. Their arrival heralds the true end of summer and, sadly, the beginning of necessary sock wearing. Pears and plums definitely have a particular sophistication about them. In color they are darker and more chic than innocent fruits from earlier in the summer. In flavor they are musky, complex, and a bit savory. I love a good strawberry, but by the time the end of August rolls around, I am ready for something with a little more depth. Thanks pears and plums, for meeting me halfway and being so sexy (HA)***

School started back up this Monday. Getting back into the swing of a more normal schedule excites me immensely. Ahh, the perils of being an adult. Some other exciting possibilities are opening up, so keep your fingers crossed.

It’s funny that after a whole day of school all I really want to do is come home and cook. On Sunday we had an approximation of tacos al pastor. However, instead of using pineapple, I used peaches and the result was very tasty and much more local, if you’re into that kind of thing. The only thing worth noting is that peaches aren’t as firm as pineapples, so they are more likely to “melt” the longer you cook them. Maybe next time I will use the peaches as more of a garnish.
Photobucket

Besides that, I saw this cute dog.
Photobucket

I’m also on the hunt for the perfect GF pastry crust. So far Gluten Free Girl and La Tartine Gourmande are giving me some good ideas! I think I’ll ask the pastry instructor at my school as well.

I’d like to post recipes, and will soon. Right now I’m basically just eating as much fruit as possible for every meal, or making variations on my favorite summer theme of gazpacho and BLTs.

**read an article in the NYT where the groom said he lusts for the bride in a very primal way. WHA?! TMI TMI! Keep it to the produce, folks.

toast!

Not always considered the most interesting of foods, toast is still tasty. If you’re on a gluten-free diet, good toast can feel like a fondly remembered dream. Usually I use this blog to talk about homemade food, but once in a while it’s nice to have something simple and ready to go.

Photobucket

The bread shown above is gluten-free, believe it or not! It tastes good, like regular bread! You can eat a sandwich without having to chew your bread for 15 minutes. I am also happy to report that this bread makes excellent toast, something that is sure to come in handy when school starts back up and I no longer have time for leisurely breakfasts of yogurt and fruit. This brand of gluten-free bread is called Udi’s. It comes from Denver and is sold at larger health food grocery stores like Whole Foods (if you are in Chicago, it is also sold at Strack and Van Til). You can also buy it online directly from the company and have it shipped to you.

My hair stylist is a very strict adherent to the gluten-free lifestyle. When I’m in her chair we spend a lot of time talking about food. In the past few months, I’ve gotten very serious about adhering to a gluten-free diet. I feel better than I have felt in a long time. She was really excited for me and gave me a whole loaf of Udi’s bread to try. I’m so happy she did, I can’t wait to have some grilled cheese!

As a side note, I have lived in Chicago for about 6 years. It feels like I have gotten my hair cut at nearly every salon in the city. I have been going to Sparrow for over a year now and, in addition to giving me free bread, Susan is a phenomenal hair stylist. I only get my hair cut once every 3-4 months and she does a wonderful job. I’m so happy that I finally found a salon where I am consistently happy with the results!

Cold Roasted Salad

The hot days of summer demand a few things: low effort tasty foods that leave leftovers so I can go to pool more and not worry about what to eat. It’s a tall bill to fill, but this salad manages just fine. I only wish there were more of it!

Photobucket

Ingredients:

1.5 lb tiny/fingerling potatoes, all potatoes cut in half (if you use regular big potatoes, just cube the potatoes into 1″ dice)
1 lb itty bitty tomatoes (no subs, they are too cute) pricked so they don’t burst in the oven
2 ears corn
1 can cannellini/ garbanzo beans, drained and rinsed (I didn’t have these for some reason but they will taste good)
2 slices bacon (you can definitely omit this, I just included it because I’m a Midwestern fatty who grew up eating potato salad with bacon in it)
Olive Oil TT for roasting veggies
TT Salt
TT Pepper
TT Crushed Red Pepper

*Foil and parchment paper make this a lot easier with the corn and tomatoes.

(For the dressing)
1/2 cup goat cheese
1 cloves garlic, finely minced
2 TBS olive oil (or rendered bacon fat from when you cooked your bacon)
1 TBS balsamic (or whatever vinegar you like, I used a little apple cider vinegar too)
1TBS honey
Fresh basil chiffonade (however much you like)
TT Salt
TT Pepper

Instructions:

1. Set your oven to 400 and roast your potatoes with some olive oil and salt/pepper until they are soft in the middle and golden brown on the outside (about 45 minutes), set aside. While you are doing this, you can also cook your bacon, let it cool, then finely chop it up, so it’s almost like bacon dust. Save your bacon fat.

2. Roast your tomatoes with some olive oil and salt/pepper until they begin to caramelize (about a half hour), set aside.

3. Roast your unshucked corn in foil until its cooked, set aside (if you want the kernels to get a little brown, just turn on your burner and let it roast a little on the flame— just don’t tell your landlord and please remember to remove the leaves and corn hair first)

4. When everything is roasting, you can make your salad dressing. Take your vinegars in a bowl and slowly whisk in the olive oil or rendered bacon fat. Add the goat cheese. If your using your freshly rendered bacon fat, the goat cheese will melt right away. If you are using olive oil, it helps to use goat cheese that has come down close to room temperature. With enough mixing, you’ll get a creamy looking dressing. Add the garlic and honey, whisk until combined. Then, add the bacon dust if you’ve decided to go with bacon. Taste your dressing- if it’s too acidic, add more honey! Now is a good time to add salt and pepper. Tweak it however you like!

5. When all of your veggies are roasted, shuck the corn, and cut the kernels off the cob into a bowl. Add the potatoes and tomatoes. If I had beans, this is where I would put them- cannellini beans would play especially nicely with the vegetables. Next, add the dressing. Toss the dressing in the salad so that everything is evenly coated. Now add the basil and crushed red pepper. Here you go! Easy roasted summer salad. Chill it in the fridge and take it to a bbq or just eat it all yourself.

**You might wonder why I’d recommend roasting veggies when it’s so hot outside. Well, I like how cold roasted vegetables taste and besides the time commitment, the recipe is pretty easy. Watch a show or read a book while the veggies roast!

**This recipe could be vegan if you omit the cheese, honey, and bacon, just saying. It would also do fine without the garlic!

Gluten Free Meatballs

As I’ve mentioned before, organizing a gluten free diet can be a little more difficult that planning a conventional one. However, instead of dwelling on the fact that so much is off limits, it’s much more fun (and useful) to think of delicious alternatives that don’t harm one’s body. When you are eating gluten-free, you have to look out for gluten in all of its sneaky forms. This captor lurks in the most hidden places: soups, fried foods, soy sauce, meat substitutes, and obviously most breads (which unfortunately includes pizza). It gets especially hard when you enjoy cooking for and with other people. However, finding alternatives and substitutions for gluten can be fun, and when the experiments are successful it’s very gratifying and delicious.

A friend and I and are splitting a meat CSA this summer from Simply Wisconson. GB and I came home from vacation to a freezer full of meat. I realize if you’re vegetarian, this probably sounds disgusting. But, if you’re a meat eater knowing you are supporting small farms with sustainable practices actually makes the meat taste even better. We received pork chops, a ham steak (uncured and huge), ground beef, italian sausage, chicken thighs, chicken legs, two large steaks, and ground bison. Now, I love a good hamburger, but lately I’ve been craving meatballs. Unfortunately, most meatball recipes contain gluten. So, I decided to make a new recipe, and it turned out well.

Photobucket

Ingredients:

1 lb ground beef
1 lb ground Italian sausage
1 egg
4 cloves garlic, finely diced
1/2 large onion, roughly chopped
2 cups mushrooms, stems removed, caps diced
1/2 cup gluten free breadcrumbs*** (if you are not on a GF diet, feel free to use conventional breadcrumbs)
2 TBS butter
2 TBS olive oil
2 TBS tomato paste
2 TBS balsamic vinegar
1/2 tsp fresh thyme, minced
1/2 tsp fresh rosemary, minced
1/2 tsp fresh oregano, minced
1 cup basil (chiffonade cut) loosely packed, divided in half
Salt TT
Pepper TT
1/4 cup lemon zest (for sauce)
1 TBS “good olive oil” (for sauce)
1 1/2 tsp balsamic (for sauce)

Directions
1. If it started frozen, Make sure your meat is thawed, but keep it in the fridge until you are ready to use it. Warm meat is gross and a breeding ground for nasty bacteria.

2. Prep all your ingredients, cut them up and measure out everything else, so you’re not running around your kitchen. Now’s a good time to preheat your oven to 350.

3. Toast your gf breadcrumbs in the oven with the butter for about 10-15 minutes. I made my own gf breadcrumbs by using my food processor to chop up a gf English muffin. Gf products tend to be a bit more temperamental than conventional flour based products, so keep a close eye on your breadcrumbs toasting. Take them out the oven and let them cool a bit.

4. Combine garlic, thyme, rosemary, oregano, 1 TBS olive oil, little salt, little pepper, chopped mushroom caps, and tomato paste. Cook at 350 for 10 minutes. Take this mixture out of the oven and let it cool a bit.

5. Now, take your meat out of the fridge. Combine the Italian sausage and ground beef. Add the egg. I started by using my food processor to mix everything, but ended up preferring my hands. After the meat and egg are combined, add the breadcrumbs and mushroom mix. Now add the remaining regular olive oil, balsamic vinegar, salt and pepper, and mix it up. Lastly, add 1/2 cup of the basil chiffonade. Make sure everything is well blended.

6. Now it’s time to make the mix into little meatballs! I like to put the meatballs on a sheetpan covered with parchment paper. After I’ve made all the meatballs, I like to put them in the fridge so they firm up a bit before I cook them. I left them in the fridge for about a half hour.

7. You could cook these meatballs a variety of ways. I put some of them on skewers and threw them on the grill. The rest I cooked on the stove top. You could boil them, or whatever. I liked cooking them on the stovetop because the outsides got a little crusty and the insides remained tender. It is important to cook them through. Since I used meat that was previously frozen, I did not freeze these meatballs. If you buy meat that had never been frozen feel free to freeze these guys.

8. Eating the meatballs fresh off the grill was tasty, but I preferred eating them cooked over the stovetop topped with a little lemon zest, fancy olive oil from California, and freshly chopped basil. I love tomato sauce, but this was a nice alternative for a hot summer evening.

easy gazpacho

It’s finally hot in Chicago after a year of San Francisco like weather. As luck would have it, my favorite meal of all time tastes best in hot weather! In my brain, nothing is better than BLT served with a big savory bowl of gazpacho. I’ve been eating my mom’s gazpacho since before I can remember. I’ve never followed a recipe, so I decided to write one down. The best thing about this recipe is that it is extra-easy so you have more time for riding bikes, going to the beach, and finding secret ice cream hang outs.

I find using canned tomatoes to be the best/easiest this time of year, but once good tomatoes are able to be purchased at the market, go for it!

Ingredients:
2 cans Italian plum tomatoes (if using fresh, concasse those suckers and use about 2 lbs)
1/4 cup Worcestershire sauce
3 TBS high quality olive oil
3 TBS hot sauce
1/4 cup vinegar (depending on what kind you have, I used a hot spicy but have used Balsamic before and it’s also good)
2 cloves garlic, chopped
1 small Spanish onion
1 large cucumber, peeled and diced
1 large bell pepper, seeded and diced
ANY OTHER FRESH VEGGIES you like, I added diced radishes this time
1 small Spanish onion
Salt, TT
Freshly Ground Pepper, TT
1 avocado, sliced (for garnish)

Recipe:
1. Blend the tomatoes so they are pureed.
2. Add all the liquid ingredients, blend.
3. Add the chopped garlic and onion, blend.
4. Add all the other vegetables, don’t blend, you want it to be chunky!
5. Add salt and pepper to taste.
6. Put in storage container and let sit in fridge, at least 4 hours (the flavors marry better this way)
7. Put in bowls and garnish with sliced avocado.
8. This will keep for about two-three days and will taste AWESOME for lunch tomorrow.

Photobucket

Apologize for the bad photo, getting the camera situation worked out. GO OUTSIDE!

skillet pie

First though, my friend Whitney and I canned 4 gallons worth of produce a few weeks back. 56 cans in case you were wondering.
Photobucket

I don’t know about you, I always but prefer pie to cake. Imagine my chagrin when I realized I don’t own a pie tin. I suppose I could have gone to Target and bought one, but I thought my trusty cast iron skillet would work well as a replacement, and it did. In fact, I’m not sure if I will ever buy a pie tin. The cast iron skillet caramelized the bottom of the pie crust and it tasted so good. I didn’t use or make up my own recipes this time around, but I did do a kind of recipe mash-up (AND its not even 2007! remember mash-ups?)

I found this recipe for a graham cracker crust to be the best I’ve come across. I’m excited to experiment with gluten free graham crackers, so my mom can eat it. As a side note, one of my customers recommended that I read the LA Times Food Section. I’m so glad I got that recommendation, it’s truly great.

After I read the LA Times article, I made a pumpkin pie in my skillet.
Photobucket
It was tasty, I used molasses instead of honey.

Later in the week, I was still feeling the pie vibe and had some extra plums. I also had some random heavy cream in the fridge that I needed to use up, so I made a plum clafoutis. I used the graham cracker crust recipe from the pumpkin pie article, this egg custard recipe, soaked some plums in apricot brandy/lemon/sugar, placed the raw custard in the cast iron skillet over the graham cracker crust, artfully arranged the plums, and baked in the oven at 350 for an hour, and presto!
Photobucket
PLUM CLAFOUTIS

I love emptying my fridge.
Photobucket

hello!

The housewarming happened: 2×2 gallon containers of beverages (white sangria & watermelon margaritas) made it fun.
Photobucket

One of the best parts about having a new house is coming home and eating meals with my main man at our dining table.
Photobucket
Our first real meal (with chairs) was buckwheat pancakes topped with maple butter & homemade apricot preserves. The meal wouldn’t have been possible without our pals- maple butter from Danielle’s Montreal Trip, apricots for the jam from Annie’s back yard, and Cava for mimosas from Brendan & Rosie.

I went to the farmer’s market and bought this stuff
Photobucket

I made a healthy dinner of patty pan squash & quinoa fritatta with crimson carrot, fennel, & italian onion salad.
Photobucket

Dessert, sour cherry juleps
Photobucket
followed by a few rounds of card games.

And the view from our front room
Photobucket