the most wonderful time of the year.

I’m not kidding.  This is the most wonderful time of the year. I’m extra happy about the holiday season this year because it’s extra long.

We hosted our first holiday open house this past weekend and it was so fun. I enjoy a late night and a dance floor as much as the next lady, but sometimes it’s nice to have a deviled egg and some sparkling wine at 5pm with all of your best friends, know what I’m saying?

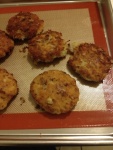
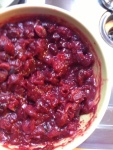
Some highlights from the past few weeks include homemade fudge, Henriot Brut Rosé, cute Christmas ornaments, wreath sightings around Chicagoland, latkes made from leftover potatoes,a beautiful holiday floral arrangement from Larkspur (who just happend to celebrate its 8th anniversary in Bucktown) & homemade cranberry relish.

Homemade Cranberry Relish (for when you realize you don’t have any applesauce for your latkes, but have a package of cranberries)

Ingredients:

1 120z package cranberries

1 shallot, minced

1 clover garlic, minced

1 cup apple cider vinegar

1/4 cup butter

1/2 cup brown sugar

Salt to taste

Pepper to taste

1/2 tsp ground ginger

Method:

1. Melt butter and saute shallot and garlic until fragrant

2. Add vinegar & cranberries, simmer

3. Add sugar, salt, pepper, and ginger. Simmer until thickened.   Remove from heat and serve with whatever you like.

slow cooked pear butter

Hi pals. In addition to having a really cute dog, my pals Natalie and Dave have a pear tree in their backyard. I was really excited to hear this. It’s quite surprising and fun to find out about all the fruit that grows wildly in Chicago. In the past year or so, I’ve found apricots, cherries, apples, and pears, just hanging out in friends’ yards. Natalie and Dave were generous enough to let me come over to their house and pick a bunch of pears. Hanging out with them is always fun, and it was a great end of summer evening.

Photobucket

I knew I wanted to make some kind of spread with the pears, but I didn’t know what kind… Did I want jam, jelly, or just preserved pears? Pears don’t really lend themselves to making jam, I don’t really have enough time to make jelly at the moment, and I didn’t feel like buying the big jars for preserving whole pears. What’s left to do? Pears and apples have a sort of similar texture, so I googled “pear butter” and found a lot of recipes for pear butter online. I used this one as inspiration, but kind of followed my own ideas too.

Photobucket

Pear Butter

Ingredients
3 quarts pears, quartered and seeded (I think the kind I picked were Bosc, in the future I would suggest Bartlett, or a creamier variety)
1 bottle Riesling
3 cups sugar
1 lemon, halved
2 TBS dry fennel (add more if you like)
1/2 TSP cinnamon (I used this very intense cinnamon, in the future, I might not put it in)
Pinch nutmeg

Directions
1. Prepare all ingredients
2. Place ingredients in slow cooker
3. Cook covered on low for 12 hours (this is great while you sleep or at work/school… You can prep the ingredients the night before and pop them in the fridge and then pop them on before you leave home for the day)
4. Strain, reduce further on the stovetop, or continue in the slow cooker
5. When your butter has reached the desired thickness, you can get ready for canning.
6. Canning is complicated the first time you do it, but once you know what you are doing, it’s pretty easy. Like riding a bike, MUSCLE MEMORY. I’d like to write out a detailed explanation about canning, but this guide is a good start, and contains all the safety information you need to know.
7. Please keep in mind that you don’t need all of the accessories that they talk about on the canning website. I get by fine with a tall stockpot, tongs, and a soup ladle. If you decide to do it this way, be careful with the glass on the bottom of the stockpot and make sure your tongs and ladle are sanitized.
8. After you’re done, let the pear butter rest for 24 hours before you put it away. If any of the jars are unsealed, throw them away… they’re no good!
9. Enjoy your pear butter on toast or waffles. Or just eat it by itself.

Photobucket

After the pear picking, we headed to Rootstock were we gave the kitchen some pears. Duncan, the chef made us a big platter with the pears paired (haha) with Benton ham. It was delicious, and if you’ve not had Bentons ham or been to Rootstock, I would highly suggest doing both.

pears and plums

Photobucket
I’ve always though of pears and plums as the sweetest but saddest fruits. Their arrival heralds the true end of summer and, sadly, the beginning of necessary sock wearing. Pears and plums definitely have a particular sophistication about them. In color they are darker and more chic than innocent fruits from earlier in the summer. In flavor they are musky, complex, and a bit savory. I love a good strawberry, but by the time the end of August rolls around, I am ready for something with a little more depth. Thanks pears and plums, for meeting me halfway and being so sexy (HA)***

School started back up this Monday. Getting back into the swing of a more normal schedule excites me immensely. Ahh, the perils of being an adult. Some other exciting possibilities are opening up, so keep your fingers crossed.

It’s funny that after a whole day of school all I really want to do is come home and cook. On Sunday we had an approximation of tacos al pastor. However, instead of using pineapple, I used peaches and the result was very tasty and much more local, if you’re into that kind of thing. The only thing worth noting is that peaches aren’t as firm as pineapples, so they are more likely to “melt” the longer you cook them. Maybe next time I will use the peaches as more of a garnish.
Photobucket

Besides that, I saw this cute dog.
Photobucket

I’m also on the hunt for the perfect GF pastry crust. So far Gluten Free Girl and La Tartine Gourmande are giving me some good ideas! I think I’ll ask the pastry instructor at my school as well.

I’d like to post recipes, and will soon. Right now I’m basically just eating as much fruit as possible for every meal, or making variations on my favorite summer theme of gazpacho and BLTs.

**read an article in the NYT where the groom said he lusts for the bride in a very primal way. WHA?! TMI TMI! Keep it to the produce, folks.

easy pasta

Saveur Magazine is one of my favorite food magazines on the planet. It is one of the only magazines I save, and it always proves to be quite useful. Annually, Saveur has an issue called the “Saveur 100.” This year the “Saveur 100” is all reader generated, and it’s a great issue to have. I believe it’s still on newsstands as it is the January/February 2010 issue. One of the best recipes in the magazine is called Crabs and Spaghetti.
Photobucket

I’ve adapted the recipe a bit. If you’d like detailed directions, I’d suggest purchasing the magazine or looking at their informative website. Essentially, you sautee some onions in olive oil, add chili flakes, basil, garlic, celery salt, and a can of whole peeled tomatoes. You reduce that until it has thickened, and then you add the crab. Meanwhile, you should be cooking some pasta on the stovetop while you’re making the sauce. I’ve found corn & quinoa pasta to be a great addition to my pantry and that is what I tend to use when I eat pasta. Once you add the crab to the sauce, your pasta should be done. Drain the pasta, put it into bowls, and serve with crab pasta sauce on top. I found the celery salt to be a welcome addition to the tomato sauce and am excited to use it in more recipes. Also, I modified the recipe from Saveur a bit, the recipe in the magazine calls for heavy cream, but I wanted to keep it light.
Photobucket

skillet pie

First though, my friend Whitney and I canned 4 gallons worth of produce a few weeks back. 56 cans in case you were wondering.
Photobucket

I don’t know about you, I always but prefer pie to cake. Imagine my chagrin when I realized I don’t own a pie tin. I suppose I could have gone to Target and bought one, but I thought my trusty cast iron skillet would work well as a replacement, and it did. In fact, I’m not sure if I will ever buy a pie tin. The cast iron skillet caramelized the bottom of the pie crust and it tasted so good. I didn’t use or make up my own recipes this time around, but I did do a kind of recipe mash-up (AND its not even 2007! remember mash-ups?)

I found this recipe for a graham cracker crust to be the best I’ve come across. I’m excited to experiment with gluten free graham crackers, so my mom can eat it. As a side note, one of my customers recommended that I read the LA Times Food Section. I’m so glad I got that recommendation, it’s truly great.

After I read the LA Times article, I made a pumpkin pie in my skillet.
Photobucket
It was tasty, I used molasses instead of honey.

Later in the week, I was still feeling the pie vibe and had some extra plums. I also had some random heavy cream in the fridge that I needed to use up, so I made a plum clafoutis. I used the graham cracker crust recipe from the pumpkin pie article, this egg custard recipe, soaked some plums in apricot brandy/lemon/sugar, placed the raw custard in the cast iron skillet over the graham cracker crust, artfully arranged the plums, and baked in the oven at 350 for an hour, and presto!
Photobucket
PLUM CLAFOUTIS

I love emptying my fridge.
Photobucket

budget margarita/ gringo tacos

If your like most people, the the current recession has really taken the wind out of your sails. This blog entry is a siren call! While a lack of funds certainly takes a toll, remember that money doesn’t equal happiness and you can usually have a large amount of fun for a small amount of money. Since I love going to the grocery store, I find I usually have quality staples around my house for a decent meal. Since I also love spending time at my house rather than a bar, I keep an eye out for deals on alcohol that my nearests and dearests enjoy. Hence, budget margaritas and gringo tacos, a phenomenon of Winter ’09.

Corn tortillas pretty much go with anything, and if you have a gluten allergy, they can quickly become your BFFs. So, you have tortillas?
Photobucket

Get some goat cheese.
Photobucket

Make a tuna salad (my house recipe currently includes Genova Tuna, this crazy Turkish spice my friend Sean brought home for me, a healthy dose of natural mayo, and a healthy dose of Dijon mustard. Yes, Genova is made by Chicken of the Sea, but it’s really good and packed in olive oil, and I like it.) Put the goat cheese in a taco, when it’s cooked add the tuna, eat and enjoy.
Photobucket (this is a kind of gross picture of tuna salad in the making)

Now, on to the fun part. The guys I work with always mix really good tequila with Squirt. I decided to follow their lead after talking it over with GB.
Photobucket

Get some good tequila. Put a shot in a glass, top with Squirt. Cut up whatever citrus you have, squeeze into the glass, and enjoy.
Photobucket
Delicious, and cheaper than buying all those limes. Just try not to think about the corn syrup.

back

The good news is, I received a new camera for Christmas. The bad news is, I haven’t posted in almost 2 months! I’m back, with a camera, so prepare to eat. So far, the winter has proven to be extra chilly and pretty productive. I’ve been working a lot, the end goal being a trip to visit my brother in Mérida, Mexico, playing a lot of board games, getting financial stuff worked out for culinary school in the fall (it’s really happening!), and the thrill of thrills- growing out my hair.

Thus far, the best recipes of this winter have been tomato jam and various soups. After a scary encounter with a scale at a Superbowl Party (uh, probably not the best time to step on a scale), I’ve decided that I need to eat more vegetables and less bacon. I won’t call it a “diet”, but I also won’t call it “eating whatever I want to eat.” Working at a restaurant with one of the best burgers in the city hasn’t helped with the bacon intake, and the kitchen has put me on a bacon embargo… We’ll see how that works out when I work a double next Saturday.

Eating more healthfully, but not less deliciously, involves a little more thought than sticking butter and starch in the oven. Today I’ve made Quinoa and Roasted Cauliflower Salad (I didn’t turn into a hippie, I promise). Quinoa is quite the superfood, according to my extensive Wikipedia research. Regardless of its nutritional properties and rich history, quinoa is pretty damn tasty. It has a nutty taste, kind of like brown rice, but better, and less chewy. At said Superbowl Crisis Party my friend was talking about how you shouldn’t cook with garlic and onions at the same time. I don’t know if I agree 100%, but today I tried just using garlic, and I was pleased with the results. The garlic paired especially well with the nuttiness of the quinoa and the sweetness of the roasted cauliflower.

Also, a slice or 4 of crispy fried proscuitto on the top would take this recipe to the next level on my tongue and hips, but you know, the bacon embargo makes that kind of impossible.

Ingredients
1 cup dried quinoa, prepared as directed (it’s nice in the salad warm; this will also leave you with three cooked cups)
1 head cauliflower
2 handfuls fresh baby spinach
1 cup grated carrot
1/2 cup small tomatoes, chopped in half
1 cup mushrooms, chopped
1 clove garlic, minced
2 tablespoons olive oil, divided
1 tablespoon good balsamic vinegar
1 tsp salt, divided into two 1/2 teaspoons (I use Kosher)
As much freshly ground black pepper as you like
1 tablespoon freshly grated Parmesan Cheese.

Recipe
1. Preheat your oven to 350. Clean and chop your cauliflower so there are no greens. Place in roasting pan. Drizzle one tablespoon of olive oiland one 1/2 teaspoon salt on the cauliflower and mix up with your hands. Cover in pepper. Roast at 350 for abut 45 minutes.
Photobucket

2. Wait a few minutes, check your email or twitter or facebook or read a book. Relax! Now, stop relaxing and start your quinoa. Using a 1/2 quart sized saucepan, put one cup of dried quinoa in the saucepan with two cups of water. **You should rinse the quinoa before you cook it. Bring the water to a boil. Once the water is at a boil, reduce the heat and let simmer until all the water is absorbed.
Photobucket

3. While all this is happening, you should saute the remaining veggies in the olive oil. Add the garlic after a few minutes; when it is aromatic, add the balsamic vinegar. It should be sizzling. Reduce the heat so that nothing gets burnt.
Photobucket

4. Remove your cauliflower from the oven. You’ll only need half of it for a LARGE single serving. Put the cauliflower in the bowl you feel like eating out of. Remove your veggies from the heat and add them to the bowl too. Put your spinach on top of that, and then top it off with a healthy serving of cooked quinoa and not as much Parmesan as you would like.
Photobucket

5. Add salt and pepper,stir up, and eat! The heat from the roasted cauliflower and the cooked vegetables will wilt the spinach and melt the cheese. You do not need any extra dressing for this recipe because the vegetables are cooked in what is essentially a dressing. It’s a pretty healthy lunch and if you follow these directions you’ll have enough for a cold salad tomorrow!
Photobucket

Mexican Potato Chowder

Huh. It appears that the only thing I have been eating for the past month is soup. That statement is mostly true. Soups are easy to invent, delicious, and time friendly. Today, we’re taking a departure from the Indian food, and taking advantage of the Mexican grocery stores that are abundant in Chicago. It should be noted that this recipe is not vegetarian, kosher, or particularly healthy, but it is delicious and perfect for evening when your plans include watching Gossip Girl and complaining about your period. This recipe is also nearly impossible without an immersion blender, but use your brain and improvise something! It doesn’t need to be blended, I just like building my base that way. I’m serving it with some tortillas.

Ingredients:
1 tablespoon olive oil
1 cup ground Chorizo (preferably fresh)
3 carrots, grated (about 1.5 cups)
1 clove garlic, chopped
1 large onion chopped
3 stalks of celery, chopped
1 large can of peeled whole tomatoes and their juices. (28oz size)
28 oz. water (use the can from the tomatoes)
1.5 teaspoon cumin
1 teaspoon oregano
1 jalapeno, chopped and seeded
4 pickled serrano peppers, chopped (EXNAY!!! After further thought and taste, this makes the recipe nearly too spicy to enjoy, without the aid of A TON of sour cream. If the dish isn’t spicy enough, each taster can add her own hot sauce. )
2 peppers, chopped (I used red and orange, don’t use green)
5 large potatoes, chopped
1.5 cup cream cup cream
1 lime
Sour cream
Tortilla Strips
Large pot for cooking

Recipe:
*Please read all the ingredients first. Chop them up accordingly. It’s very important to do this because it will make your life much easier.

1. Simmer olive oil in pot until it is shimmering.
2. Add chorizo and cook until it is no longer raw.
3. Add carrots, onion, celery and garlic to the cooked chorizo. Its ok that it is still red- chorizo is prespiced with red spices.
4. Cook this for about 5 minutes, or until the onions get soft. Adjust the heat as needed so that nothing burns.
5. Add your tomatoes and water.
6. Take your immersion blender and blend everything in the pot until it is smooth.
7. Add your cumin and oregano, stir.
8. Add your jalapenos and serranos
9. Add your potatoes, cook until tender.
10. Add cream, cook until it it’s to the temperature you desire.

Serve this with a dollop of sour cream, a squeeze of fresh lime, and tortilla strips on top. It pairs well with quesadillas, but then you’ll have to work out tomorrow.

curry enchiladas and mashed cauliflower

Indian and Mexican cuisine are a great example of (nearly) opposites attracting. I apoligize, I am still camera-less, but still excited about Mr. Obama being my (nearly) president, so I’ll forgive my camera being dead. Earlier in the week, I had my friend Lisa over for dinner and Gossip Girl (a must watch for Monday nights). Lisa is a vegetarian and I am not. Most people in my life try to be vegetarians most of the time (see my roommate) so, it is not hard for me to cook vegetarian food. It’s an enjoyable challenge, met with vigor and enthusiasm on my part.

I served some vegetable soup (a variation on a previously posted recipe, unfrozen), mashed cauliflower, and curry enchiladas. I’ll detail the recipes below.

Since I am trying extra hard not to eat wheat these days, sometimes things feel pretty grim. I wanted Indian food. My friend is in India right now, and it’s been on my mind as well as in the news. Is it tacky that a crisis gives me a craving? Probably, but what’s a better way to express concern than through sharing a meal with someone you love? All the good energy we shared during our meal was directed towards India, so I’ll try not to feel too guilty about it.

Mashed Cauliflower
Ingredients:
1 large head of cauliflower
1 tablespoon butter
1 tablespoon olive oil
1/4 cup half and half
2 different teaspoons of salt
As much pepper as you like
1 8×8 pan
An oven preheated to 350 degrees
Hand blender (makes it easier, a regular blender or potato masher will do well if you don’t have this amazing appliance)
1 large/medium sized bowl

Recipe
1. Clean your cauliflower.
2. Chop off the green parts
3. Dice the remaining parts of cauliflower into smaller pieces (all this should fit in the previously mentioned 8×8 pan)
4. Place the chopped cauliflower in the pan, drizzle with olive oil
5. Sprinkle with 1 teaspoon of salt
6. Place in oven
7. Roast for 30-45 minutes (everybody’s oven is different)
8. After it’s roasted, the cauliflower should be soft. Move the roasted cauliflower into the bowl (if you’re using a blender, place it in the blender… if you’re using a masher, place it in the bowl)
9. To the bowl (or blender) add the half and half and butter. The cauliflower should still be quite warm, so the butter will melt without a problem.
10. With your hand blender, (or masher, or regular blender) mix up all the ingredients until they are blended and smooth. Add the remaining salt and pepper when you feel like it.

This dish is great. Cauliflower is very nutritious and this is a fantastic way to incorporate it into you diet along with butter and half and half. Just kidding. It’s better than mashed potatoes, but still not super healthy. I must note, this dish is not for people who do not like cauliflower. I happen to love it, so it worked out well, but not so much for Lisa.

And now to the big shebang: Curry Enchiladas
As I mentioned before, not eating wheat totally blows. There’s no other way to get around it. So, instead of mourning the loss of naan with my Indian food, I decided to just let it be and make Indian style enchiladas. This recipe has a few parts: Filling, Sauce, and Corn Tortillas. Read the whole recipe before you begin because it has several parts that need to be happening at the same time.

Filling for Indian Enchiladas:
Ingredients
1 large potato
2 tablespoons Tandoori Masala Spice
1 tablespoon Curry Spice
1 teaspoon crushed Coriander
1 small onion
1 clover garlic
1/2 cup olive oil (separated into 4 1/8 cups)
As much salt as you like- I used Kosher Salt
1 large pot
1 large pan
1 small pan

1. In the large pot, boil your peeled potato until it is tender.
2. While the potato is boiling, saute the onions in 1/8 cup olive.
3. Combine the curry, tandoori, and coriander with the remaining olive oil into a paste. Once the onions are sizzling and fragrant, add this paste into the onion and olive oil already on the pan. Let that marinate for a minute or ten.
4. By this time (about a half hour) the potato should be soft. Strain the potato and chop it into small square pieces. After that, combine it with the curried onions.
5. Cook the potatoes in the pan with the onions until they get caramelized on the edges. Since you’ll be cooking the sauce at the same time, you can let the potatoes brown. I let the brown for about 45 minutes.

CONCURRENTLY: Curry Sauce
Ingredients
1 15oz can Coconut Milk
1/4 cup curry powder
1 tablespoon tandoori spice
1 teaspoon garam masala
1 tablespoon crystallized ginger, chopped
1/4 cup water
Salt to taste
1 medium sized sauce pan

Recipe
1. Open the coconut milk and pour it into the sauce pan. Make sure you get all the solids from the can into the saucepan. I put the water needed for the recipe in the can, caught all the remnants and then poured that into the sauce pan.
2. Add all the spices and ginger.
3. Bring mixture to a boil, turn down and let reduce. You can taste test it now and decide how much salt you want.
4. When it is reduced to a thickness similar to mole, you are finished!

Once your filling and sauce is done, you are ready to roll the mix into tortillas.

Curry Enchiladas:
Ingredients
Potato/ Onion Filling
8 Corn Tortillas
8 slices Chihuahua Cheese
Curry Sauce
4 x 9 Pan
Oven preheated to 350 (f)

Recipe
1. Prepare your tortillas by laying them flat and placing half a slice of cheese in the middle of each.
2. On top of the cheese, place the potato/onion filling.
3. Roll the tortillas so that the filling will not come out.
4. Place the stuffed tortillas in the pan, again so the filling is not coming out (I did this one at a time and had some help from toothpicks to keep things closed)
5. Once your pan is filled, cover the stuffed tortillas with the remaining slices of cheese, halved so that everything is symmetrical.
6. Once the cheese is in place, pour all of the curry sauce on the stuffed tortillas
7. Place in the oven and let cook for 30-45 minutes (everybody’s oven is different)

These are really tasty. Too bad I don’t have a camera at the moment. bah humbug.
It’s worth noting that without the cheese, this recipe is vegan, so that’s a plus if you are one or know some.
Also, these keep really well in the fridge and are easily reheated in your oven.

PS: Not everybody has such immense access to cheap specialty ingredients in the town where one resides. A quick Google search informed me that there is an immense variety of authentic Indian food available on the internet for much less than typical grocery store prices. I’m sure that shipping makes it more expensive, but Garam Masala from McCormick’s isn’t nearly as tasty (and is 5x more expensive) as the real deal.

PPS: We paired this with a variation on a gin gimlet.
St. Germain Gimlet

Ingredients
1.5 oz Hendricks Gin (Plymouth would probably be better)
.75 oz St. Germain
1 oz fresh Lime Juice
.25 oz simple syrup
Ice
Shaker

Recipe
1. Place Gin, Germaine, lime juice, and simple syrup in shaker over ice.
2. Shake.
3. Serve in a martini glass.